Tuesday, August 10, 2010

Buh bye popcorn!

We had an awesome summer, we went to Disney World a couple of weeks ago, we hung out, enjoyed the sun and just had an awesome time. I really tried to completely focus on the kids for the past month, hence my no posting/no projects. We really needed the down time, and I'm so glad we were able to have it. However, the kids started school yesterday. Sigh. I'm already missing them. BUT...motivation as taken over and I'm already getting a ton done. Which is good, because my house looks like a war zone. Let me back up.

I loved the kitchen, but let's face it. I didn't have a clue how to do anything when I "finished" it, and compared to the other things I've done, it showed. I worked forever on the cabinets, and I was really happy how they turned out...but they were too always a little too "antiqued". The tile was too busy. And since we redid the living room, the cream in the kitchen had a pinky peach tint compared to the bright white of the living room. Since they're adjoining rooms, it was annoying, not mention ugly. Don't even get me started on how much I disliked the wallpaper. If you remember, awhile back I talked about putting up the nicer, more expensive wallpaper. Much to my dismay, it's been discontinued and replaced with one that isn't prepasted. Not prepasted equals "no freaking way am I going to use it". Ok, so plan B. Only I didn't have a plan B. I had briefly considered putting up real beadboard, but Hubs hates it. He only agreed to beadboard because it was wallpaper, and therefore not permanent. So real beadboard was out. I wasn't really feeling a big change, so I decided to just remove the wallpaper and give the walls a new coat of paint. Easy enough.

This is what happened when I took off a sheet of wallpaper.

The ceiling came off. Literally peeled right off! The walls are fine, it's the ceiling that's destroyed. Hrm...this was really not in the plan. I wanted to do a quick fix: remove the wallpaper and repaint the walls. Everything else, although not exactly my vision, would just have to stay as is. Except now, my popcorn ceiling is peeling off. After a few frantic text messages to Hubs, we decided we'd just scrape and be done with it. It was going to a huge mess and a lot more work, but in the end it would be worth it.

He's not sure it's going to be worth it.

This is the crap that was ALL over the floor, the counter, the cabinets, the dogs, it was EVERYWHERE. Fortunately, the popcorn came right off. We just sprayed it with water and lightly scraped. It did make a gross paste, but it wasn't nearly as hard to do as I'd thought it would be.

This is what it looks like now, sans popcorn. If you decided to take this on in your house, I'd HIGHLY recommend a dust mask. Also, if your house was built before 1979, you should get the ceiling tested for asbestos. Also, do your research. They have all kinds of products that will remove the popcorn, so you might want to go that route. I think I just got lucky that it came off so easily with water.

I finally have the mess under control, but in what I can only think of as temporary insanity, we decided it would a good idea to rip out all the tile and repaint the cabinets. More on that later :P

Saturday, July 10, 2010

New living room/dining room

Since the day we moved in to our new house, one of the rooms that has really bothered me was the living room. Sure, it was big, but it really lacked any character at all.


It always felt to me like it lacked any definition, and was reaaaaalllly boring. So after 6 longs months and countless hours of convincing Hubs that beige (even Ralph Lauren beige) isn't a real color, we finally decided to tackle the living room.

Like night and day! I was telling Hubs the other day, it feels like someone just turned on a light!

We decided that in order to create character, as well as some architectural interest, we added a chair rail.

We weren't sure what the "official" chair rail height was supposed to be, so we just eyeballed it to the height that looked best (it turned out to be 44 inches). Then we painted the bottom half Valspar's "Ultra White" in a semi-gloss finish, and the top half Martha Stewart's "Heavy Goose" in a flat finish. It was my first time using Martha Stewart paint, and I'm really happy with it. I'll definitely be using it again.


Then we attached 1x4 pine boards to the wall with a nail gun and filled in the nail holes with wood filler and sanded it back to smooth before we painted them white. Originally, we weren't going to use really good wood for the chair rail (we were thinking more along the lines of MDF), and honestly, this was kind of an accident. We went to the lumber yard to try to save some money on the wood, and the guy there assured us that we wanted "clear" wood, which just means is has no knots in it. That sounded good, but we had no idea what he was talking about. He was asking us all kinds of questions and saying all these things that I'd never even heard of. Our response was "uhh, ok. Whatever you think is best..." Seriously, no idea what he was talking about. It looked great on the walls, but not really the way we thought it would, it looked much fancier!

Unfortunately, the walls aren't level and bow in and out in some spots, so putting it up was more difficult than it should've been. Yes, I could've torn down the drywall and fixed it, but we were so close to being done! I couldn't stand the thought of starting over. Between the uneven walls and the great looking wood, we scrapped our original idea of board and batten and just stuck with the chair rail. The wood for the whole room and the hall cost about $50.

I wish these pictures did it justice, but it just FEELS different in the room. It's so much lighter, cleaner...more peaceful.


I really pared down the accessories in the room, I wanted it to feel less cluttered. I only used the items that I absolutely loved, the rest were put away. I got the starfish at one of my favorite antique/cool stuff that you can't find other places store. They were $1 each! The bell is from Marshall's and "Boats" sign is from TJ Maxx. I can't remember exactly how much they were, but they were less than $10 each.

I dry brushed the buffet with Martha Stewart's "Driftwood Gray" (it used to be black). I haven't decided whether or not I'm going to sand the edges, I'm really loving the worn look it has now. I'm also really happy with how the fireplace looks now. I know everyone says to not have a whole bunch of pictures on your mantle, but I don't care. I love my pictures, and I think it looks cool. I think especially since they're all black frames, it really looks de-cluttered. The mirror is the same one that was on the fireplace before, just repainted.

The white chair is the Pottery Barn Charleston chair. Now before you think that Hubs has lost his mind and let me buy a $1000 chair, let me just say that I paid a whopping $30 for it. Yes, you read that right, $30! Craigslist, baby! It's the most comfortable chair on the planet, and probably the best $30 I ever spent.

The other major thing we did was make a dining room area. The living room was certainly big enough, and it was totally unused space before. It also means now I have room in the kitchen for an island/breakfast bar (a project which I haven't tackled yet!).

The "Crab Shack" sign is one of my favorite things, it's from Virginia Beach. We were there 2 years ago for my daughter's cheerleading championship, and I saw in the window at night as we were walking down the street. The store was closed, and it was our last night there, so I sighed and resigned myself to the fact that it wouldn't ever be mine. The next day, Hubs made sure we were waiting outside when the store opened and begged the lady to sell it to him (it was the last one). He's pretty awesome like that. The bench and chairs are both from a consignment store, we paid less than $50 for all 3 of them. All I did was paint them and distress the edges. I can't remember the name of the paint, all I know is it's Glidden. I threw away the can and didn't even write the name down. Sorry :(

The table is is from an antique store.

It's made from an old church pew from Saluda, South Carolina. We love it, it's the perfect size, not only for the space, but also for the four of us. I love how it's so rustic and simple but so pretty all at the same time.

So there you have it. My new living/dining room! I still have some touch-ups to do, and we're still figuring out what to do with the floor molding, but I love it so much. It's so much better than I'd even imagined! I have to say though, there was no way I could've done all this without my husband's help. He was the muscle behind this one, and he's like a surgeon with a nail gun! (except for when he nails it through pipes in the wall!)

Sunday, June 27, 2010

Kids' Bathroom

Since we're pushing a month since said I so profoundly said, "I'm hoping (fingers crossed) that tomorrow will be a before and after day", I thought it was time for an update. I fully intended on spending June working away on the house, crossing things off the to do list, making it so I had nothing to do in the fall except watch football and eat nachos, but as it so often does, "stuff" got in the way. I've actually spent the last two weeks painting the outside of a house (sadly, not my own) in this ridiculously hot Georgia weather. It blows my mind that the thermometer says 98, but "real feel" is 108. It's nuts! It really makes outside work miserable. But I had the kids to keep me company, so it wasn't all bad.

Anyway, the bathroom is 98% done. But since I'm all about the "so it's not perfect", I'm going to show it anyway. I didn't even clean it before I took pictures (even though I wanted to really, really bad!) because I'm trying to live by this new mantra.

I don't have a true "before", just imagine the ugliest bathroom you've ever seen. Now add green and yellow plaid wallpaper, a yellow counter and matching pea green sink. That's my before. The after is MUCH better. I'm pretty happy with how it came out though, even though technically it's not done. We still have the floor and ceiling trim to do, but it's fully functional and looks pretty darn good.

Originally we thought that this would be the "guest bathroom", but 1. we don't have many guests, and 2., we have two kids who really wanted their own bathroom. So now we call it the kids' bathroom. If it was a guest bathroom, I would've fancied it up with some flowers or something, but for the kids, it's just not practical at all. The kids really couldn't agree on anything, so I suggested painting the walls white and using black accents, and they loved that idea. So we went for it.

These two pictures were painted by each of the kids.We got them at their school's art show this spring. I thought hanging these in the bathroom was a great way for them to be able to really be a part of the decor, plus they're colorful, fun and are a great contrast to the white walls and whitewashed floor.

We hung the medicine cabinet over the toilet. The extra mirror really opens up the whole room, which is no easy task in a window-less bathroom. My daughter uses the baskets underneath to store all those girly things that used to clutter up the bathroom (brushes, elastics, lotions, soaps, etc.). This used to hang over the sink, and Hubs and I really liked it there, but my daughter's number one complaint was that she couldn't see herself in the mirror over the sink.

We addressed her complaint by hanging a larger mirror and making it low enough to work for her. This mirror was one of the first things I bought after moving here, and I love it. I had envisioned using it in the living room, but it really looks great in the bathroom, so I don't mind giving it up.

I really love how it looks like it belongs with the vanity and sink.

For once I picked the cheapest fixture! We got this fixture at Home Depot, I think it was $20 or something like that. I think it's so retro and cool.

It's a really, REALLY small bathroom, so I tried to keep it light, and of course I tried to keep the kids in mind when decorating it. The wall color is Valspar Ultra White, and the floor is the same vinyl planks that I used to cover the walls, which of course what led to this whole renovation!

Overall, I'm really happy with how it came out. It was A LOT of work, so much more than we thought it would be. But it was worth it, the kids are thrilled and I'm thrilled not to have four people sharing a bathroom anymore!

Friday, June 4, 2010

So it's not perfect...

Unfortunately yesterday wasn't a "before and after" day. Yesterday was more of a "sleep all day and be lazy day." The bathroom is still not done, but it's close. Maybe tomorrow (fingers crossed!). Yesterday was also a "have an epiphany day." I've been talking a lot with Hubs lately about how frustrated I've been with the house. I mean, don't get me wrong, I love it. But I'm exhausted. I have spent nearly every waking hour trying to perfect every corner of this house. I look at catalogs and magazines and try to duplicate what I see on their glossy, perfect pages. It's just not working, not for lack of trying, but there's just something missing.

Hubs (in his "I'm saying this as nicely as possible so you don't hate me" manner) told me that maybe it wasn't working because I was trying too hard. At first I was really, REALLY offended. How could he be so nonchalant? Didn't he understand that I was trying to make our little house into the perfect cottage? But the more I thought about it, the more I realized he was right, as much as it pains me to say. In striving for the "perfect cottage", I got so lost in mimicking someone else's vision of cottage, that I lost my own vision. The reason I wanted to make the cottage vibe in our home was because I love the feeling of a cottage. To me, cottage means, comfortable, easy, unassuming. It's a kind of relax and just chill out vibe. It reminds me of being a kid at my grandparent's summer place, it just makes me feel like home. The fact that I wasn't capturing that was maddening. And Hubs was right, I was trying too hard. You can't perfect a vision that isn't even your own.

This is our first home, and I'm learning as I go. The biggest lesson so far? So it's not perfect...but maybe, it's just right. It's a lesson that I need to remember not just about our home, but also about life in general. So I've changed the name of my blog. I want to reflect who we really are, and we're not perfect, and that's just fine by me.

Wednesday, June 2, 2010

In a handbasket, Part 2

It occurred to me this morning, I'm ridiculously bad about updating this blog. I don't have time to update my blog about my home renovations because I'm too busy doing home renovations! However, I'm going to try REALLY hard to do better. I miss writing, a lot. I feel like I need something to do other than be covered in a constant shroud of drywall dust and paint.

Anyway. I was telling about the horror that was our front yard: broken sewer pipes, hand digging trenches, plumbers who won't show up, etc. I know, I sound bitter. It's just that we went from this:

To this:

Ok, I may be exaggerating a bit on the first picture. It actually looked like this:

What you can't really see in this picture is how awful it really was. Yellow plaid wallpaper, straight out of the 70's on one wall, the other walls were this horrid green color (which you can kind of see in the mirror's reflection). It's also the size of a small closet. Literally, my bedroom closet is bigger than this bathroom. But, I was determined to make it better. When we moved it, there was a wall to wall sink/vanity thing that took up nearly half the floor, it was so big you couldn't even use the toilet without bumping into it. Oh, and the countertop was yellow. Like the wallpaper. It was so ugly. I don't think I even have any pictures of it, it was out of here so fast! We took that out almost as soon as we moved in and discovered the previous owners didn't tile all the way to the wall. They only tiled to the vanity. So we had an area of bare concrete covering about 20% of the floor, which was super pretty. We replaced the sink with a much smaller, much less Brady Bunch sink.

The walls were also in really, REALLY bad shape. They had wallpaper and paint layered and layered. I tried refloating the wall (did you know I could do that?! Shocked me too!), I tried painting (you can see my test area on the left of the picture, a rally pretty blue), and finally I had the best idea ever. I'm talking EVER, people. I took some whitewashed vinyl plank flooring, the peel and stick kind, and used it as wall covering. See it there in the picture? The pretty boards?Basically, redoing the walls weren't in the budget and I wasn't about to live with yellow plaid for the next 10 years, so I thought this was pretty smart. I really liked how it was turning out, it was very beachy and cool. My only problem was that because the walls were in such bad shape, the planks weren't sticking very well, so we got out the nail gun and away we went. So here I am being all crafty and smart, and the plumber says, as she's hooking up the plumbing in the master bathroom (which is adjacent to this bathroom), "what is this? A nail?" I wish I could describe the sheer horror that was on Hubs face. Indeed it was a nail. Right through the copper pipes. Then she said, "Hmmm, I see some mold back here." I literally thought I was going to pass out. Just so we're totally clear what I'm talking about here, the pipes were the pipes inside the wall, like the ones that you're never supposed to have to worry about, or even know are there...unless of course you decide to nail up vinyl plank flooring to the wall, then it might be a good idea to know where they are :(

Suffice it to say, the walls were coming down. Hubs and I decided there was no way we were going to chance letting the mold spread, so we ripped down the whole wall. Just for good measure, we ripped out the other 3 walls too. I mean, why not, right? You're already down to the studs, it's not like you're not living in a horrific mess anyway.

Hubs ripping down drywall.

See that purple through the wall? That's our bathroom. We were already putting up sheetrock in there because they hadn't been up since we moved in.

He thought it would be helpful to demonstrate this point. I tried to demonstrate the same point, but I got my head stuck in the wall and got a bruise on my face from trying to squeeze it back through the wall. Sadly, we don't have a picture of that.

Ok so, down to studs in the bathroom. Which is no problem because our plumber has agreed to fix all the pipes, hang the new drywall, re-install the tub surround, and basically get us back on the right track again. Except she disappeared. Again. For several weeks, she came off and on. She'd work for about an hour and leave. Then one day we decided we'd had enough. We asked her to complete all the plumbing, make it functional and all that, which she did. We fully planned on asking her not to come back when we spoke to her the next day, but she never came back. It's been 4 weeks, we think she probably won't show up again. So, Hubs and I did it ourselves.

To date, we've hung all the drywall, taped and floated all the seams (I did that part, which I still can't believe. I'm really good at it!), we put up the tub surround, laid most of the new floor, and Hubs reinstalled the sink. We still have a little more left to do, I have to caulk the tub seams, we have to attach the knobs in the shower, finish the floor and touch-up paint, but we're almost done. I'm hoping (fingers crossed) that tomorrow will be a before and after day. I can't WAIT for it to be done.

For anyone keeping track, this week marks our 6th month in the new house, as well as the 8th week that we've been dealing with these plumbing issues.

Monday, May 10, 2010

Welcome to Mantucket

I know that I promised Part 2 of the horror that is my front yard/plumbing issues, but I was so excited to do this project, I decided to finish and do a big reveal! Well that and yesterday was Mother's Day, and I promised my mom I'd finish and post pictures. So here you go Mom!

One of the most neglected rooms in our house (or any house we've ever lived in) has been the master bedroom. It's a lot of work to do to prettify the place where you sleep. Hubs and I have been so done, I'm talking D-O-N-E with renovation drama, that we really felt like we needed a calm, quiet place to relax. To me, that means white on white, with hydrangeas and white roses, flowy curtains and all that pretty girly stuff, to him, it means beige on beige with some more beige thrown in for good measure (he really dislikes color). Normally he pretty much goes along with whatever I want without too much complaining, so for our bedrooom, I really wanted to make it a masculine space that he felt comfortable in, while keeping it pretty. I think I succeeded.

Here's the before. Not bad.

Here's the after. Isn't it pretty?! It feels very Nantucket (Hubs calls it Mantucket) to me. This is the view from the doorway.

I started by painting the bed white. What an immense pain that was! Those little spindle thingies...ugh. It was terrible. Plus, I was trying to save time, so I decided not to use primer before I painted. Big mistake. It took 3 coats and didn't even cover everything! In the end, I decided that I liked that you could still see through the white a little bit. It gives it a little bit of a white washed/aged look in some spots. But if I had it do again, I'd use primer. I just got lucky that I like the white washed look.

The oar I had hanging in the living room. The bedding is the same, I just flipped the comforter over so it was all white showing.

These are the pictures that really inspired the room. We found the large one at TJ Maxx for $14.99, and the other two were taken at The Point (I talked about it here, if you need a refresher!). One of my favorite things about The Point was that you could see the tall beautiful trees and the ocean, all at the same time. I really wanted to convey that feeling I used to have, and I wanted to bring in the ocean AND the trees.

In order for the bed to be centered in the room, we had to do away with one of the bedside stands. We tried to make it work, but when you opened the closet door, you hit the nightstand. So while it may have been more symmetrical and "normal" to have the two matching nightstands, we opted for function. This little stand was in my living room, then in the kitchen, and I think now, it's found it's permanent home.

I asked the kids to find me "interesting sticks", and this is what they brought me. Works for me! I got the jar/vase thingy at TJ Maxx for $3.99. I put some river rocks in the bottom to hold the sticks in place, and voila!

The lamp is another TJ Maxx find ($24.99).

The view from the other side of the room

We cleared EVERYTHING off the dresser. I don't think I've ever seen it so empty! At first I planned to paint the dresser white too, but decided against it. I think it adds some rustic charm as it is.

We found the sailboat in the garden aisle at Lowes for $19.99. I can't really imagine this in a garden, but I like it on the dresser!

Really, the only I other things I did were paint the trim white (Valspar Ultra White) and put down an area rug (Lowes $98). Normally, I think area rugs over carpets are kind of silly, but it's a necessity for us. We really want to put down hardwood floors, but it's just not in the budget right now. This lightens up the room and hides a lot of the carpet, especially where our monster of a puppy had chewed chunks of the carpet out.
So there you have it. Nantucket, Mantucket, I don't care what it's called. I love it!

Tuesday, May 4, 2010

In a handbasket, Part 1

It's tempting to call me a slacker because I haven't posted anything since the end of March, but I promise, I have a good reason (and pictures!) Let's start with the timeline of very unfortunate events.

April 1- My parents came to visit, and we had such a good time! We went to the aquarium and Coke World in Atlanta, we went to the zoo, we showed them around our own city, it was wonderful, we really needed the vacation, and I loved seeing my family.

(Taken at Coke World. See? We're very happy)

Then it went bad. Very, very bad.

April 9- Things were starting to get back to normal. I was making potato salad for dinner, and I noticed that the sink was draining slow. I ran the garbage disposal, figuring it was a little backed up, and it spit water up the opposite side. Uh oh. I call the plumber (who can't come for hours) and wait. As I'm sitting across the room, pouting at my inability to not be able to use the kitchen sink, the dishwasher (which wasn't even running) starts pouring water all over the floor.

The plumber finally comes, and she (yep, she. Our plumber is a lady) tells us that there's no blockage in the kitchen sink. She does all sorts of plumbery things, and asks if we have problems with other drains. Since we moved in, all of our drains have run kind of slow, but honestly, hubs put in the 2 toilets and the bathroom sinks, so I kind of thought it was just because he didn't do it right (sorry hubs!). She says it must be tree roots that have gotten into our drainage pipes. So what does this mean?

It means that my newly planted lawn is getting dug up. But that's not the worst of it. The County Water people came out and ran a camera through the sewer line and spray painted where the mysterious roots were. Then we had all of the other utilities come and mark where their lines were (it would be really, really bad to hit a gas line and blow up the neighborhood!).

The neon green paint is where the roots are, all of the orange lines are gas lines. So, we can't get the big yellow digger to dig this hole. It has to be done by hand.

April 15- We had the heavy machinery start the hole, and hubs and plumber started digging a trench toward the curb.

Doesn't look so happy now does he? Oh! I forgot to mention, they broke the water line when they dug the big hole AND the broke the sewer line. So he's standing in a muddle of mud and...well, there's no nice way to say this. Poop. He's standing in poop.

After about 8 hours of digging , it looked like this.

Lots of roots, but still haven't found the culprit.

That black wire running across the hole is a cable wire, also bad to hit with heavy machinery.


Another couple of hours, and we're at the curb. Hubs is really happy about it, as you can see. Actually, he wasn't bad, he just kept "suggesting" that I pick up a shovel and start digging. How can I take pictures if I'm digging? Geesh. Anyway. There are no tree roots anywhere near our sewer lines. None. Mind you, at this point, I have a 5 foot wide hole in my front lawn and the sewage pipe hasn't been repaired yet, so every time you flush the toilet it goes to the hole in the front yard. We called the County back and told them we dug to the curb and there was nothing. They assured us there were roots, but they'd come back out and run their camera again. Is it possible that the spot was mismarked? Perhaps it's on the street-side and not in our yard? Certainly not! It MUST be on our side, otherwise, all this digging would be for nothing, and the county would have to take over and fix the issue. Hmmm, interesting. They were going to send a crew first thing in the morning.

The sewage pipe was taped (yep, taped) back together so the county could take apart in the morning. And we waited. And we waited. And we waited.

April 23- After calling the office about 387 times, I was finally able to speak to someone who assured me that they would send a crew right over. After a lot of back and forth, calls to supervisors and raised voices, they agreed to fix it.

I don't know that they ever found this elusive root. I thought it would be in bad taste to take pictures of them working, they were really not happy with me after all this, so I don't know what exactly they did. I know they did hook all the pipes back up, and they did bring a bunch of dirt to cover up the hole. Hubs and I covered the hole, but there's still a big dirt pile left. We got sidetracked with other problems. Yes, there's more. And it gets worse.

Part 2 tomorrow!

Tuesday, March 23, 2010

Renovations by Luke (and a new coffee table)

A couple of days ago, after a great night out together, we walked into the house to a huge surprise. Our precious baby, Luke, barely 4 months old decided to renovate our living room.

We weren't gone for that long, and he's really not normally this destructive. He's doesn't even chew shoes, I never in a million years thought he's eat my furniture. So how could one tiny little puppy cause so much damage?

Luke is not tiny, he's a 60 pound beast. He apparently just really didn't like our ottoman. So he ate it. Hubs was so not impressed. But, I, trying desperately to smooth the waters, and make sure that we still had a puppy in the morning, had an idea. Why don't we just finish what Luke started and start over with the ottoman? I wanted a new coffee table anyway. Hubs was still not impressed, but he's a good sport, so he played along. He started by getting his frustrations out by ripping the crap out of the rest of the pleather with a knife removing the pleather exterior.

Then we took off the hinges. The ottoman was also my secret hiding spot for dvds and games I hadn't put away when I unpacked boxes. It also hides my secret love of the video game "God of War". I suck at video games, which is why I have a cheater's guide, but there is something about beating the hell out of things that is just so stress-relieving. FYI though, it's NOT a kid's game, when they say "M for Mature", they really mean it. I don't even play it when the kids are awake, it's really, really violent. Anyway, I'm digressing.

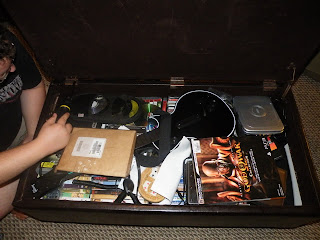
Ugh, what a mess! So anyway, we'd removed the exterior, took off the hinges and cleaned out all the crap, we found some boards we'd had left over from the kitchen. Hubs measured and cut them to fit the top.
Then I had him cut them again, some in half, some in thirds, all staggered-like, sort of like a wood floor would look. Then he nailed them in with the air gun nailer thingy. I'm sure there's a technical name for it (which I clearly don't know), but it's really just a nail gun connected to a hose and a large air tank.

It was already looking better, but it wasn't quite right, so I used my Valspar Antiquing Glaze, and just rubbed it on the bare wood. THAT made it look cool. The color was different on every board, some lighter, some darker. We hammered some very large nails in, both for effect and make sure the thin boards didn't lift at all. We did the same thing to the bottom of the ottoman, but ran the boards vertically. Here's what it looks like now.

The metal corner pieces were hidden under the pleather, so we just reattached them. I also used a glue gun to attach some jute to the top edge.

The whole project cost me about $3.99 (for the jute), I had everything else on hand. It took probably 3 hours from start to finish. We're really happy with the finished product, it sort of reminds me of driftwood.

Can you believe something this cute caused all this?

I'm thinking he probably did us a favor.